

Hi All!
I have been a very busy lady.
I have been making a bunch of really EASY projects using Digital images from The Stamping Boutique, miscellaneous laces, ribbons and seam binding from goneartsy.zibbet.com and some Heartfelt Creations papers from Country Craft Creations.
Some of my favorites are the “count down” boards. The first one I made I just printed Snowman Father Time (found here and on sale 40% off
http://www.thestampingboutique.com/item_571/Snowman-Father-Time-Digital-Stamp.htm )
as large as possible onto kraft paper and made a shelf using chipboard and dice to count down the 12 days til Christmas.

Then I used Snowman Father Time again and printed him as large as I could to trace him onto the dry erase board and chalk board. I used sharpies on the dry erase and puffy paint on the chalk board to color him in. Both the boards are magnetic so the snowflakes are magnets! I left the “days til Christmas” off the chalkboard so he counts down EVERYTHING! days til our anniversary, days til light show, days til New Years, days til Hubbys Birthday, Days til Spring, you get the idea right? I also made him smaller versions for students lockers ( days til winter dance, days til big test, days til spring break ). How about using him as a “how much snow have we gotten?”.


I did a similar technique and painted Snowman Sign onto the glass from a frame to showcase a photo of my newest niece. 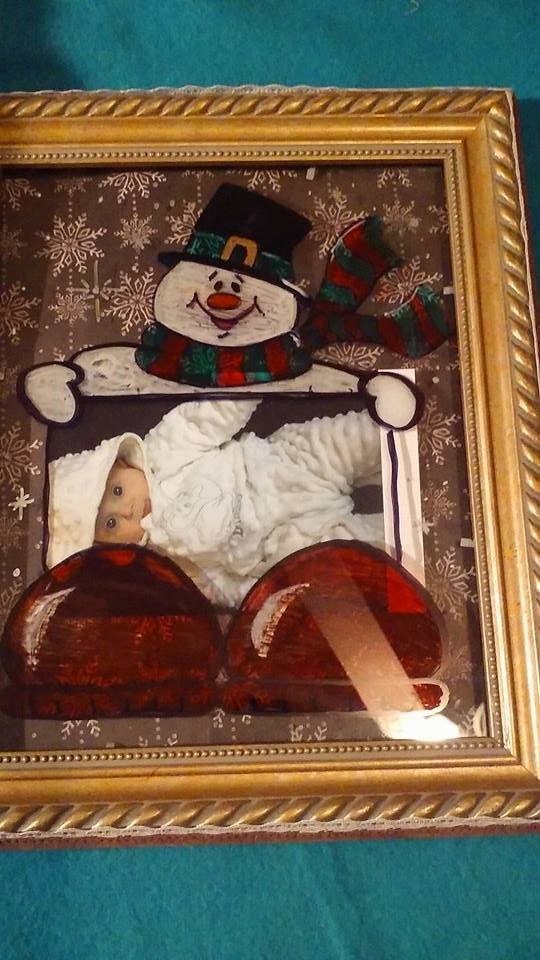
I am so addicted to Father Time I used him again for some New Years Survival Kits for my sons and niece who were talking about going out for New Years for the first time. I made 4 from 1 sheet of 8 1/2×11 and just printed him and the saying then scored 1/2″ and 3″ from each end. cut into 4 and make into pillow boxes. They are just large enough to hold 1 chap stick and 1 mini tic tac. I added Cab free ride code and phone numbers inside in case they loose their phone or battery charge.


I whipped up a bunch of place settings using Snowman Sign and made 4 from 1 sheet of 8 1/2×11. Everyone thought they were great. I used a bunch of Snowman images to make my version of the snowman on candy I saw on pinterest. These took no time or special tools to make.


I went easel card CRAZY ! Tamra at Country Crafts Creations got me started during our online crop before Christmas. I made some to display the earrings that were gifts to my sister and niece. I used candy canes to make the stop and a video tutorial is available here https://www.youtube.com/watch?v=6j8G7NWaOsw


These were made with the Heartfelt Creations Antiquity papers that Tamra sent me. You can find them here http://countrycraftcreations.com/t/heartfelt-creations


This card is made using Prima Butterfly Garden papers from https://miriamscraftingblog.com/shop/
The charm is from there too. Mirriam has a lot of great specials on metals, charms and some papers.


Today I decided to make some hot chocolate holder cards. These are SUPER Fast and Easy, 2 from 1 sheet of 8 1/2×11. Score at 1/2 then 4 1/2 on short side. Then cut at 5 1/2 ACROSS the score to make 2 pieces 5 1/2x 8 1/2 with scores at 1/2 and 4 1/2. Taper edges of 1/2 part and fold then glue bottom and side. Punch a hole at top for ribbon and you are set. Make sure ribbon is long enough to go to bottom of card when packet is inside. This one uses Snowman Bring it on.


This one is a little fancier. I used HC Antiquity and made a tag for outside and a larger tag (using the cut a parts) for inside.


Inside Tag


Since so many make a resolution to be more organized I made a note pad to help them out. I used Snowman Father Time to emphasize time management 😀 I added some Gone Artsy snowflakes and bling.


I used a new release called Angel Face to make this ribbon doll. I used 1 butterfly appliques from Gone Artsy found here http://goneartsy.zibbet.com/shop?shop_section=119169 I used a whole bunch of random Gone Artsy laces including http://goneartsy.zibbet.com/elegant-long-dangle-lace-trim-ga322
Elegant Long Dangle lace.
The image traced onto some velum bags makes great Angel Kisses.

The last project for today is a card using Boots and Spurs from TSB, I printed on kraft and colored lightly, then a few layers and it was done.

Well that’s it for today. If you have any questions message me anytime.
Now go have some fun!
Miki
