Fast and Fun Projects

Standard

Hi All!

I have been a very busy lady.
I have been making a bunch of really EASY projects using Digital images from The Stamping Boutique,  miscellaneous laces, ribbons and seam binding from  goneartsy.zibbet.com  and some Heartfelt Creations papers from Country Craft Creations.

Some of my favorites are the “count down” boards. The first one I made I just printed Snowman Father Time (found here and on sale 40% off

http://www.thestampingboutique.com/item_571/Snowman-Father-Time-Digital-Stamp.htm )

as large as possible onto kraft paper and made a shelf using chipboard and dice to count down the 12 days til Christmas.

day til Christmas

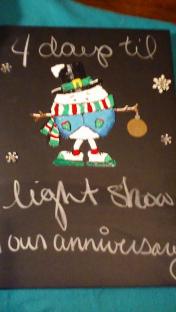
Then  I used Snowman Father Time again and printed him as large as I could to trace him onto the dry erase board and chalk board. I used sharpies on the dry erase and puffy paint on the chalk board to color him in. Both the boards are magnetic so the snowflakes are magnets! I left the “days til Christmas” off the chalkboard so he counts down EVERYTHING! days til our anniversary, days til light show, days til New Years, days til Hubbys Birthday, Days til Spring, you get the idea right? I also made him smaller versions for students lockers ( days til winter dance, days til big test, days til spring break ). How about using him as a “how much snow have we gotten?”.

count down anniversary         12358282_10200926094470230_130661124_n

I did a similar technique and painted Snowman Sign onto the glass from a frame to showcase a photo of my newest niece. tracey snowman frame

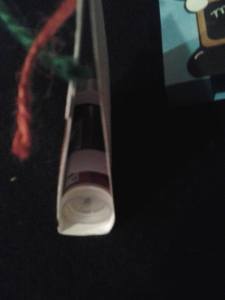
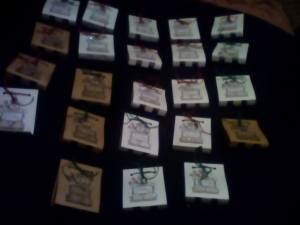
I am so addicted to Father Time I used him again for some New Years Survival Kits for my sons and niece who were talking about going out for New Years for the first time. I made 4 from 1 sheet of 8 1/2×11 and just printed him and the saying then scored 1/2″ and 3″ from each end. cut into 4 and make into pillow boxes. They are just large enough to hold 1 chap stick and 1 mini tic tac. I added Cab free ride code and phone numbers inside in case they loose their phone or battery charge.

new years 1  new years 3

new years 4

I whipped up a bunch of place settings using Snowman Sign and made 4 from 1 sheet of 8 1/2×11. Everyone thought they were great. I used a bunch of Snowman images to make my version of the snowman on candy I saw on pinterest.  These took no time or special tools to make.
pinterest snowman candy12399148_10200926095550257_373755026_n pinterest snowman candy (2) place setting place setting2

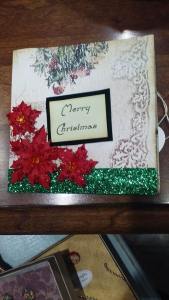
I went easel card CRAZY ! Tamra at Country Crafts Creations got me started during our online crop before Christmas. I made some to display the earrings that were gifts to my sister and niece. I used candy canes to make the stop and a video tutorial is available here https://www.youtube.com/watch?v=6j8G7NWaOsw

12319593_1065231500164878_1362608806_n  12380292_1065231463498215_254339251_n 12387987_1065231530164875_178326902_n

easel cards TSB

These were made with the Heartfelt Creations Antiquity papers that Tamra sent me. You can find them here http://countrycraftcreations.com/t/heartfelt-creations
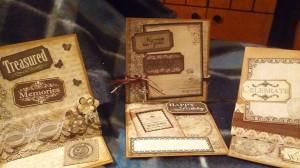
HC easel 4 HC easel 5 HC easel 6
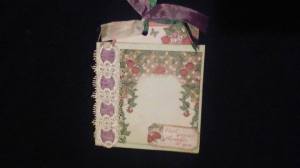
This card is made using Prima Butterfly Garden papers from https://miriamscraftingblog.com/shop/
The charm is from there too. Mirriam has a lot of great specials on metals, charms and some papers.
debs easel card2 debs easel card4 debs easel card5

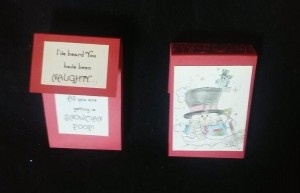
Today I decided to make some hot chocolate holder cards. These are SUPER Fast and Easy, 2 from 1 sheet of 8 1/2×11. Score at 1/2 then 4 1/2 on short side. Then cut at 5 1/2 ACROSS the score to make 2 pieces 5 1/2x 8 1/2 with scores at 1/2 and 4 1/2. Taper edges of 1/2 part and fold then glue bottom and side. Punch a hole at top for ribbon and you are set. Make sure ribbon is long enough to go to bottom of card when packet is inside. This one uses Snowman Bring it on.

hot choco snowman hot choco snowman2
This one is a little fancier. I used HC Antiquity and made a tag for outside and a larger tag (using the cut a parts) for inside.
hot choco HC3  hot choco HC2
Inside Tag
hot choco HC hot choco HC1

Since so many make a resolution to be more organized I made a note pad to help them out. I used Snowman Father Time to emphasize time management 😀 I added some Gone Artsy snowflakes and bling.
new years 1 new years 2

I used a new release called Angel Face to make this ribbon doll. I used 1 butterfly appliques from Gone Artsy found here http://goneartsy.zibbet.com/shop?shop_section=119169 I used a whole bunch of random Gone Artsy laces including http://goneartsy.zibbet.com/elegant-long-dangle-lace-trim-ga322
Elegant Long Dangle lace.
The image traced onto some velum bags makes great Angel Kisses.
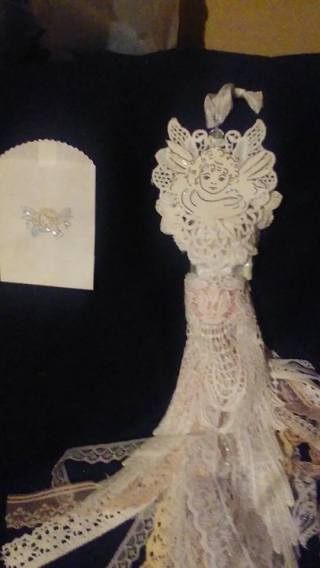
angel face ribbon doll

The last project for today is a card using Boots and Spurs from TSB, I printed on kraft and colored lightly, then a few layers and it was done.
boots spurs
Well that’s it for today. If you have any questions message me anytime.
Now go have some fun!
Miki


Christmas! ( at least the prep for it )

Standard

HO! HO! HO!
I know I have again gone missing but I have really been cranking out the projects and trying to meet deadlines. I was invited to join The Stamping Boutique’s thestampingboutique.com DT for this term. They are the site to go to for the scarecrow that I use over and over. They also have some really great winter/Christmas images and just released new Valentine ones. So a bunch of the projects you will see today are using images from there. I asked Melissa if we could have a code for a discount for todays online crop over at Scrapbookers of Country Crafts Creations in Hooper https://www.facebook.com/groups/1585111948390881/1695096410725767/?comment_id=1695100840725324&notif_t=like   so she put the whole collection of winter/Christmas images on sale for us, 40% off!  So stop by there and say Thank You.

Ok so on to why you are here. The challenge for the online crop is to make one ( your choice ) of the following fast and easy projects. You will get one entry for each set ( most of these make 3 or more per page so that makes a set ).
In addition to Tamra’s challenge I am holding my own here. Comment below with a link where I can see your project and I will enter you into MY challenge for a 10$ GC to Gone Artsy goneartsy.zibbet.com/   You get one entry for each set you make, and an additional entry if you use a Stamping Boutique image. That is for my challenge. You can use the same set for both challenges as long as you put the photos/comments in the right places.

First project is the chapstick holders. For a bunch I used TSB image snowman sign and made a cut file ( these are selling like crazy at the store downstairs ). For the ones I am giving as gifts and the ones I made to order for other Avon reps and some Mary Kay reps I just printed, cut and colored/glammed them up. I preprinted mine so that they had a greeting and youravon.com/michelleridgway on them then colored, scored and cut.

chapstick 2

12308135_1062218937132801_3246722859466633278_o

12243808_10200854386557577_203917938_n

STEP BY STEP
1 score at 4″ and 4 3/8″ on the 8 1/2 side ( one side will be 1/8 longer but no one will care once its done )
2 cut into 3 pieces 3 1/2″ x 8 1/2″
3 fold one side under ( if I was making the color ones I folded the back under – when I did the cut file I folded the front down as paper piece would cover the cuts )
4 (optional) I scored at 3/4, 1 3/8, 2 1/8, 2 3/4 these are marks for the cut lines. There is a tip for quick scoring and remembering where on my youtube video for this. ( dang youtube wont load! so the tip is – I put a piece of standard scotch tape on the top of my score board and mark where the scores would be so I don’t have to look for measurements and count etc everytime I am doing quick projects, the tape comes off easy and no permanent marks on my board )
5 Cut from fold to score line. There will be four cuts. Once these are done you can fold the two 5/8″ tabs to create a fold line on no scored side.
6 Now open and push those tabs in to create ‘holder’ for chapstick.
7 Decorate.

These can be made by the dozens in no time flat and would work for most any holiday with any image ( I see Valentines as a big one for these as well ).

12304203_1062219000466128_2272126853451207082_o

Second project Gwen’s Tea cards
First let me say I learned these and the saying from Gwen Casteel her Ustream is http://www.ustream.tv/channel/crafty-lady
I wish I could find the original show where she showed these but I hate the new ustream format and can’t locate anything anymore. She gave us the Christmas poem for these so ALL Credit for this version is hers. Please if you make some stop by and show her some love.
I altered the poem some for non Christmas use ( the bad grammar etc all mine ).
These are the cards that are selling out even before I can get a price on them at the store downstairs, and that others have asked about.

12348573_1062262707128424_739804977_n

Christmas poem ( Gwen’s )
On Christmas Eve at half past three
Sit down with this cup of tea
I’ll think of you, you think of me
Sitting ’round the Christmas tree

12305819_1059510630736965_1551630664_n
For these I used Heartfelt Creations papers from the grab box special that Tamra had at Country Crafts Creations https://www.facebook.com/tammyscountrycraftcreations/?fref=ts
And they are a great way to showcase the belt lace from Gone Artsy goneartsy.zibbet.com/
If you hurry you can still use my DTCode DTMiki until the end of the year for 15% off your purchase. Please stop by https://www.facebook.com/goneartsy/?fref=ts and let Deb know I sent you.

12319786_1059510607403634_280882190_n

Non Christmas poem ( mine )
At some point during your busy day
Stop and think of friends both near and far away
I will think of you, you think of me
As we enjoy this cup of tea

Directions on how to make this card ( you can make three from 1 sheet of 12×12 )
I prefer to use a double sided cardstock just make sure the images/patterns are smaller and fit into a 4×4 area

Score at 4″ and 8″
then cut across those score lines at 4″ making 3 pieces of 4×12 with scores at 4″ and 8″
make a diagonal cut on the square to the far right ( this doesn’t have to be exact and if you want pocket on left side cut diagonal on left side square.
Apply glue to bottom and short side ( if you left some ) of right hand square and fold over to attach to center square.
Decorate and add tea bag to pocket

If you prefer video I have made a quickie for this but I want to remind you this is Gwen’s card. The only thing I changed was the second poem so I can make these for non holidays.

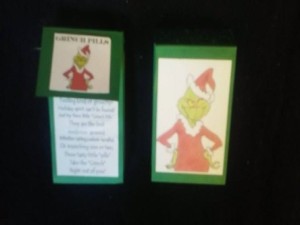
Third project is Snowman Poop/Grinch Pills
These are all the rage on pinterest etc, you can see several different versions and get printables and graphics with a quick search. All I am giving you are a few fast ways to cut, fold etc.

12324977_1061379207216774_2067276915_n 12348667_1061379053883456_542773773_n

Fully covered version
makes 3 from 1 sheet 8 1/2×11
Score and fold in half along 8 1/2″ side at 4 1/4″ ( I prefer folding but you can score if you choose )
Leaving it folded score again at 1 7/8″
Now open it and score at 2 1/2″ and 4 7/8″
Cut into 3 pieces of 2 7/8″ x 8 1/2″ ( you can cut at 3″ if that’s easier it just leaves some hangover )
This is where I decorate so I can punch holes into the inside front before I glue since punch wont fit after its glued.
You will want to try this without glue first to see where and how you want to decorate etc.
Fold in half again and you will eventually glue the two squares with exposed edge together to make flap and the rest will make a box to hold the tic tacs. REMEBER!  IF YOU WANT TO PUNCH A HOLE DO IT BEFORE YOU GLUE. Insert tic tacs into top of decorated box, they will be snug but should fit perfectly.

Flip Top version with exposed sides
makes 5 from 1 sheet of 8 1/2×11
Along 8 1/2″ side score at 2 7/8, 3 1/2, 6 7/8 and 7 1/8
Cut along 11″ side at 2″ making 5 pieces of 2×8 1/2 pieces with scores across them
Fold on scores and attach. I lined it up then used hot glue to attach front bottom, then back and left top and front top open like a flip top.
Decorate ( you could decorate before they are attached but its easier here because of which way is up where ).

The Snowman Poop is perfect to use with TSB Snowman Bring it on image.

Last but not least are handmade gift tags.12243832_10200859381402445_163148598_n These are the ones my niece and her BFF had a blast decorating and that I ran off for the kids at Thanksgiving to keep them busy and then the parents could use for Grandparents and relatives.
I used a digital image from TSB and opened Word. Using the insert function I inserted the photo and sized it down so I could make between 9 and 12 tags per sheet of 8 1/2×11. Print and color ( or let the kids color ), add some sparkle ( I used Kristina Deyette’s Sparkle dust https://www.facebook.com/groups/kristysbloominjourney/?fref=nf but the kids used dollar store glitter glue ) and you have handmade gift tags that grandparents will love as much as the gift.

That makes 4 different styles of projects and tons of variants for them. You still have time to whip up batches of these before Christmas and they make great last minute gifts, grab bag items, teacher gifts, client gifts or stocking stuffers. Phew. I am worn out. Time for some Holiday bingo and then grab some wine before the crop starts.